No Knead Dutch Oven Bread Recipe
If you’re looking for an easy and rewarding baking project, this No Knead Dutch Oven Bread Recipe is just the ticket! Imagine the aroma of fresh bread wafting through your home, making every corner feel warm and inviting. This recipe is truly a gem, especially for those busy weeknights when you want something comforting without spending hours in the kitchen. You can whip it up with minimal effort and enjoy it with family or friends, making it perfect for gatherings or cozy dinners at home.
What I love most about this recipe is how accessible it is. Even if you’ve never baked bread before, you’ll find success here! With just a few simple ingredients and no need for complex techniques, you’ll be on your way to creating a crusty, artisan-style loaf that will impress everyone.
Why You’ll Love This Recipe
- Effortless preparation: With just a few minutes of mixing and waiting, you’ll have delicious dough without any kneading!
- Perfect for any occasion: Whether it’s a family dinner or a weekend brunch, this bread fits right in.
- Customizable flavors: Feel free to experiment with herbs or spices to make it your own!
- Impressive results: Your friends and family will think you spent hours in the kitchen crafting this beautiful loaf.
- Make-ahead convenience: Prepare the dough ahead of time and bake it fresh when you’re ready.
Ingredients You’ll Need
Making this No Knead Dutch Oven Bread is all about using simple, wholesome ingredients that come together beautifully. Here’s what you’ll need:
For the Dough
- 1½ cup warm water
- 3¼ cup all-purpose flour
- 1½ tsp fine grain salt
- 1 packet yeast
Variations
The beauty of this No Knead Dutch Oven Bread is its flexibility! Feel free to get creative with these variations:
- Add some herbs: Toss in dried herbs like rosemary or thyme for extra flavor.
- Cheesy goodness: Mix in shredded cheese for a delightful cheesy loaf.
- Whole grain twist: Substitute part of the all-purpose flour with whole wheat flour for added nutrition.
- Sweeten it up: Add a sprinkle of sugar or honey for a subtly sweet version, perfect for breakfast!
How to Make No Knead Dutch Oven Bread Recipe
Step 1: Combine the Ingredients
Start by mixing 1½ cups of warm water, one packet (2.25 tsp) of yeast, and 1½ tsp of salt in a large bowl. Stir until everything is dissolved. This step activates the yeast, ensuring your bread rises nicely.
Step 2: Form the Dough
Next, add 3¼ cups of flour to the mixture. Stir until you create a sticky dough. If it feels too wet or dry, adjust with more flour or water until it reaches a good consistency.
Step 3: Let It Rise
Cover the bowl with plastic wrap or a clean towel and let it sit in a warm place for about 2-3 hours until it has doubled in size. This rising period allows the flavors to develop and gives your bread that airy texture we all love.
Step 4: Preheat Your Dutch Oven
While your dough is rising, preheat your oven to 450°F (232°C). Place your empty Dutch oven (with lid) inside to heat up for about 20 minutes. A hot Dutch oven helps create that perfect crust on your bread.
Step 5: Shape Your Loaf
Once risen, gently scrape out the dough onto floured parchment paper. Fold the edges toward the center to shape it into a loaf. Flip it over so the floured side faces up and center it on the parchment—this makes transferring to the pot much easier!
Step 6: Score Your Loaf
For decoration (and better steam release), score shallow cuts across the top of your loaf with a sharp knife if you’d like.
Step 7: Bake It Up!
Carefully remove your hot Dutch oven from the oven and take off the lid. Transfer your dough (on parchment) into the pot. Cover with lid and bake for about 35 minutes (or 40 if your dough was cold).
Step 8: Get That Golden Crust
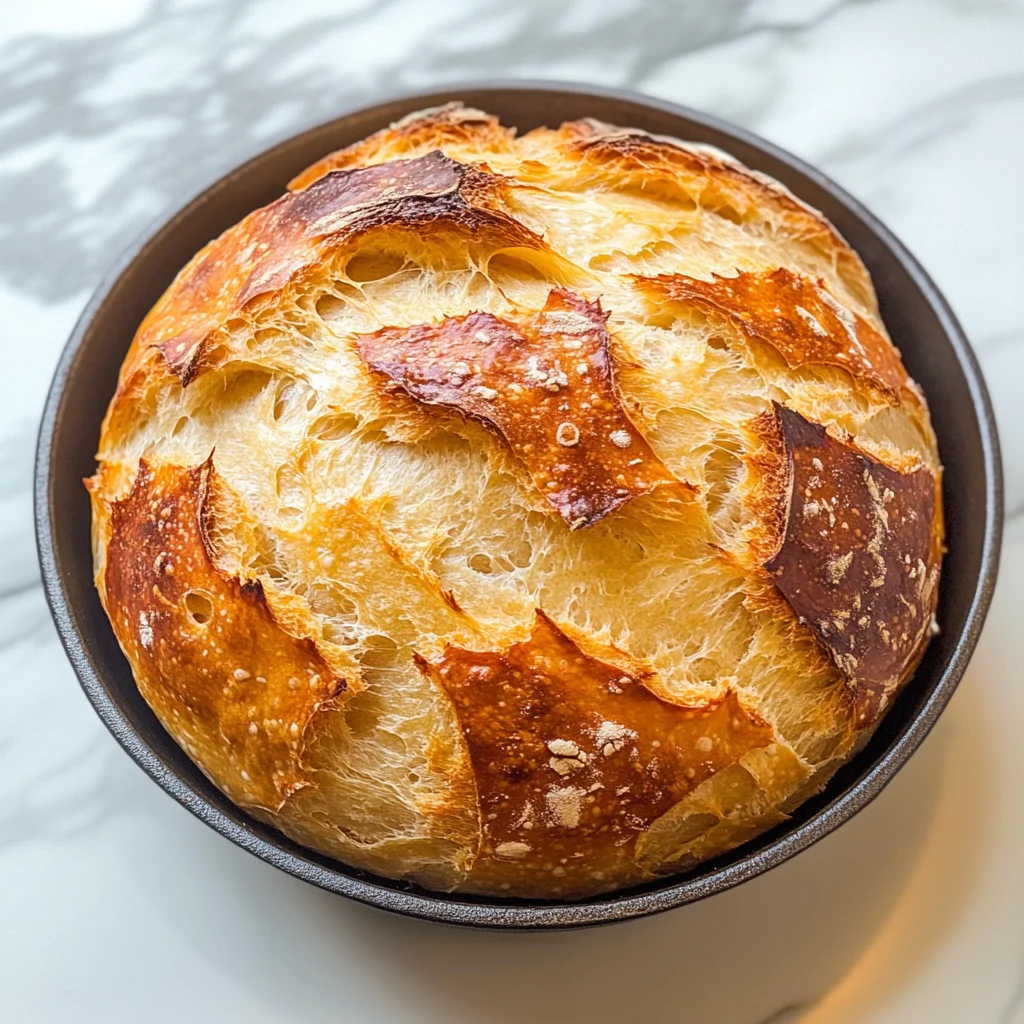
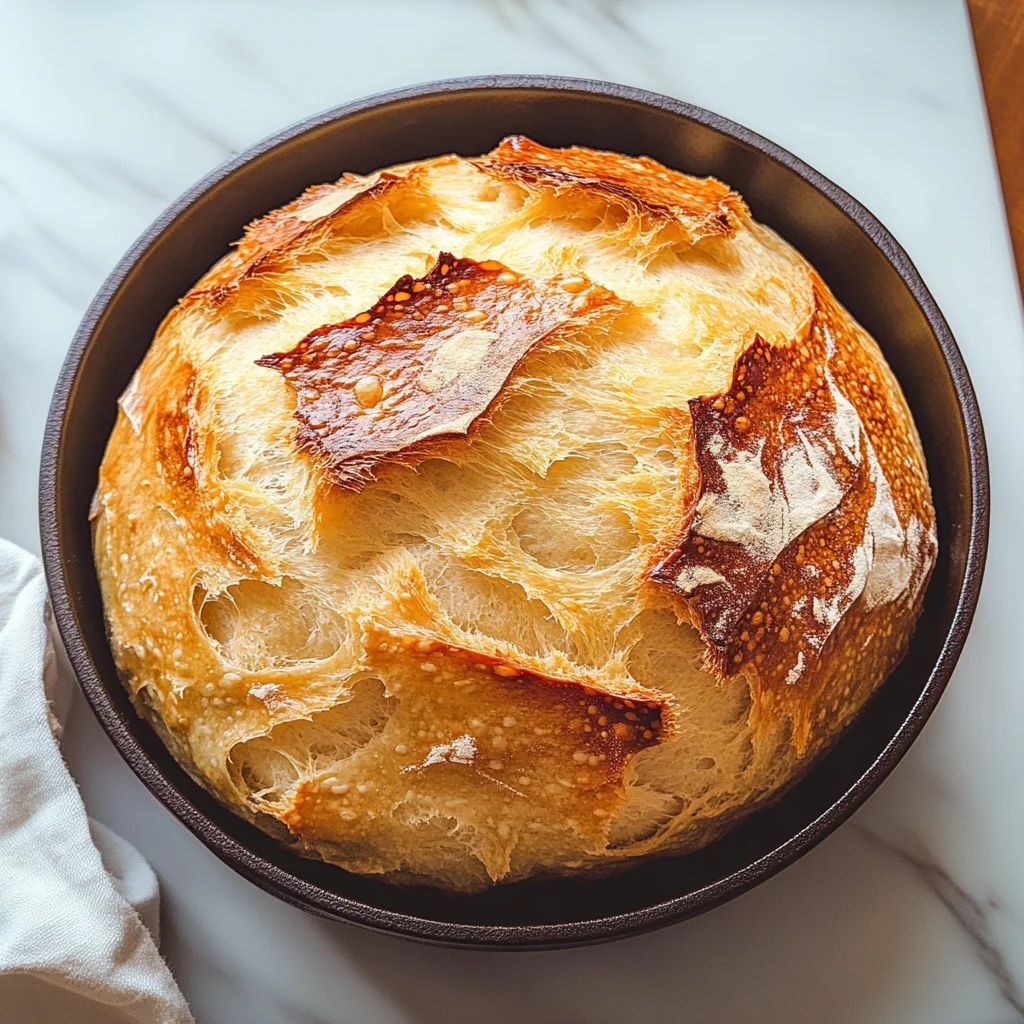
After 35 minutes, remove the lid and continue baking for another 5-10 minutes until it’s golden brown on top. This step gives you that beautiful crust we all crave!
Step 9: Cool Before Slicing
Let your glorious bread cool on a wire rack for at least 10 minutes before slicing into it. This resting time helps set everything perfectly so each slice holds together beautifully.
And there you have it! When cooled, slice into this delightful creation and enjoy every bite—freshly baked bread doesn’t get better than this!
Pro Tips for Making No Knead Dutch Oven Bread Recipe
Baking bread can be a rewarding experience, and with a few simple tips, you’ll master this No Knead Dutch Oven Bread like a pro!
- Use warm water: Warm water helps activate the yeast more effectively, leading to a better rise and fluffier texture in your bread.
- Let it rise longer: If you have the time, allowing the dough to rise for longer than 2-3 hours can enhance the flavor and texture of the bread, giving it that artisan quality.
- Don’t skip preheating the Dutch oven: Preheating ensures an immediate burst of heat when you place the dough inside, creating that perfect crust and chewy interior.
- Experiment with flour types: While all-purpose flour works wonderfully, trying different flours like whole wheat or spelt can add unique flavors and textures to your bread.
- Use parchment paper for easy transfer: Lifting your dough using parchment paper makes transferring it into the hot Dutch oven safer and simpler without losing its shape.
How to Serve No Knead Dutch Oven Bread Recipe
This delightful bread is not just about taste; it’s also about presentation! Here are some creative ways to serve your freshly baked loaf.
Garnishes
- Herbs: Fresh herbs like rosemary or thyme sprinkled on top right before baking can add a wonderful aroma and flavor profile.
- Olive oil drizzle: A light drizzle of high-quality olive oil just before slicing enhances moisture and adds richness to each piece.
Side Dishes
- Fresh Salad: A crisp green salad with mixed greens, cherry tomatoes, and a light vinaigrette complements the warm bread perfectly, adding freshness to your meal.
- Soup: Pair your bread with a hearty vegetable soup. The crusty loaf is perfect for dipping into rich flavors while adding comfort to your dining experience.
- Cheese platter: Serve with a selection of cheeses. The creaminess of cheeses like goat cheese or aged cheddar contrasts beautifully with the crunchy crust of your bread.
- Roasted vegetables: A side of seasonal roasted vegetables brings color and nutrition to your meal, making it both visually appealing and wholesome.
With these serving suggestions and tips, you’ll not only enjoy baking but also delight in sharing this beautiful No Knead Dutch Oven Bread with friends and family!
Make Ahead and Storage
This No Knead Dutch Oven Bread is perfect for meal prep, allowing you to enjoy fresh bread throughout the week with minimal effort. Here’s how to store it and keep it fresh.
Storing Leftovers
- Store the cooled bread in a paper bag at room temperature for up to 2 days.
- For longer storage, wrap the loaf tightly in plastic wrap or aluminum foil.
- Keep it in an airtight container to maintain its crustiness, but be aware that this may soften the crust.
Freezing
- Slice the bread before freezing for easy access later.
- Wrap each slice individually in plastic wrap, then place them in a resealable freezer bag.
- Store for up to 3 months; just label the bag with the date!
Reheating
- To reheat slices, simply pop them in a toaster or oven until warmed through.
- For whole loaves, wrap them in foil and heat in a preheated oven at 350°F for about 10-15 minutes.
- Enjoy your freshly warmed loaf just like it came out of the oven!
FAQs
If you have questions about this recipe, you’re not alone! Here are some common inquiries:
Can I make this No Knead Dutch Oven Bread Recipe without a Dutch oven?
Yes! You can bake this bread on a baking sheet lined with parchment paper. Just remember that it might not have the same crispy crust.
How do I know if my dough is rising properly for the No Knead Dutch Oven Bread Recipe?
The dough should double in size during the rising time. If it’s warm and bubbly but hasn’t risen much after 3 hours, it may need more time or warmer conditions.
Can I add ingredients to my No Knead Dutch Oven Bread Recipe?
Absolutely! Feel free to incorporate herbs, cheese, or seeds into your dough before baking for added flavor.
What should I do if my bread doesn’t rise?
Make sure your yeast is fresh and that you’re using warm water (not hot) to activate it. If the environment is too cool, consider placing it somewhere warmer while it rises.
Final Thoughts
I hope you enjoy making this No Knead Dutch Oven Bread as much as I do! It’s such a simple way to create something delightful and comforting right at home. There’s nothing quite like tearing into a warm loaf of homemade bread. Happy baking!
No Knead Dutch Oven Bread

If you’re searching for a delightful baking project that requires minimal effort, look no further than this No Knead Dutch Oven Bread Recipe. With its enticing aroma and crusty exterior, this bread is perfect for cozy gatherings or family dinners. The simple ingredients come together effortlessly, allowing even novice bakers to achieve impressive results. Imagine slicing into a warm, artisan-style loaf that you created at home—it’s the ultimate comfort food experience. Plus, the dough can be prepared in advance, making it convenient for those busy weeknights when you crave something special without the hassle.
- Prep Time: 15 minutes
- Cook Time: 45 minutes
- Total Time: 1 hour
- Yield: Approximately 12 servings 1x
- Category: Bread
- Method: Baking
- Cuisine: American
Ingredients
- 1½ cups warm water
- 3¼ cups all-purpose flour
- 1½ tsp fine grain salt
- 1 packet yeast
Instructions
- Combine warm water, yeast, and salt in a large bowl until dissolved.
- Stir in flour until a sticky dough forms; adjust with more flour or water if needed.
- Cover and let rise in a warm place for 2-3 hours until doubled in size.
- Preheat your oven to 450°F (232°C) with a Dutch oven inside for about 20 minutes.
- Shape the risen dough on parchment paper and score the top if desired.
- Transfer the dough into the hot Dutch oven (use parchment for easy handling), cover, and bake for 35 minutes.
- Remove the lid and bake an additional 5-10 minutes until golden brown.
- Allow cooling on a wire rack for at least 10 minutes before slicing.
Nutrition
- Serving Size: 1 slice (60g)
- Calories: 150
- Sugar: 0g
- Sodium: 350mg
- Fat: 0.5g
- Saturated Fat: 0g
- Unsaturated Fat: 0g
- Trans Fat: 0g
- Carbohydrates: 31g
- Fiber: 1g
- Protein: 5g
- Cholesterol: 0mg