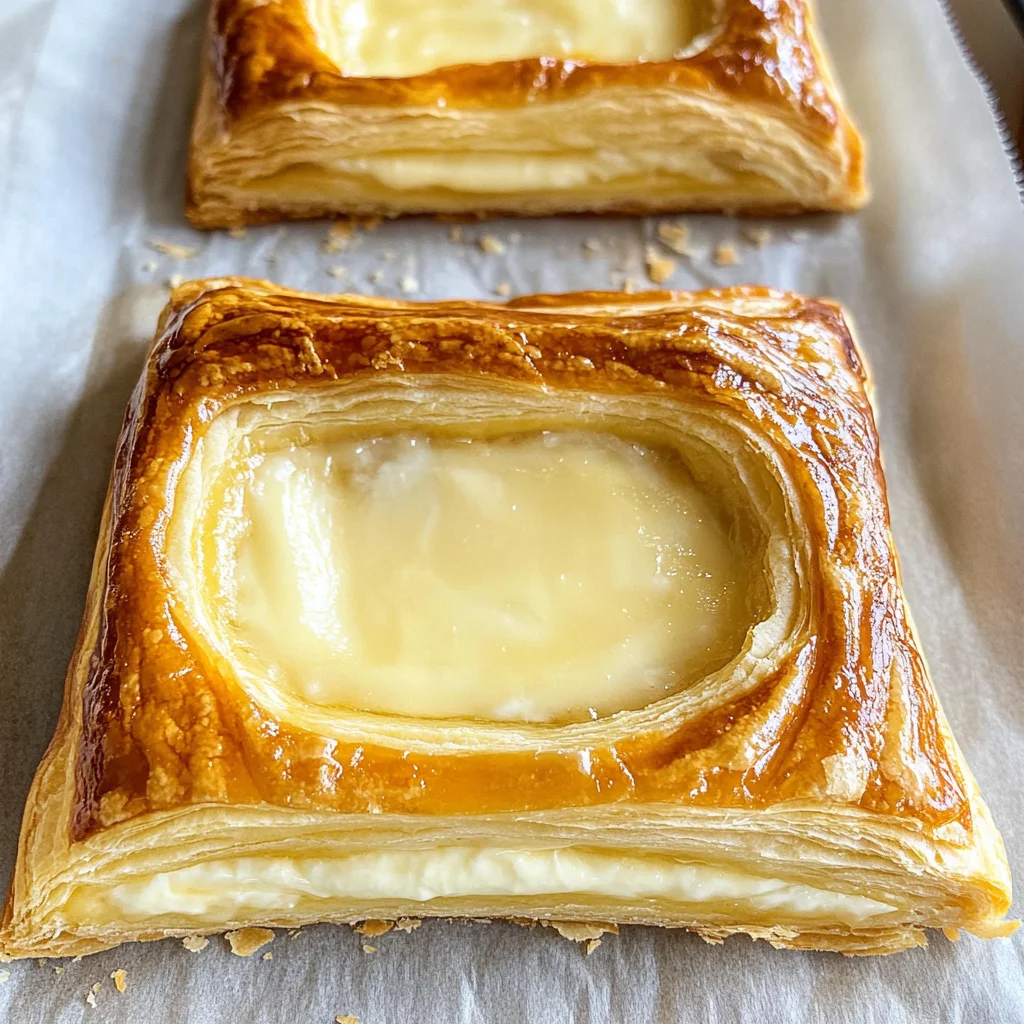
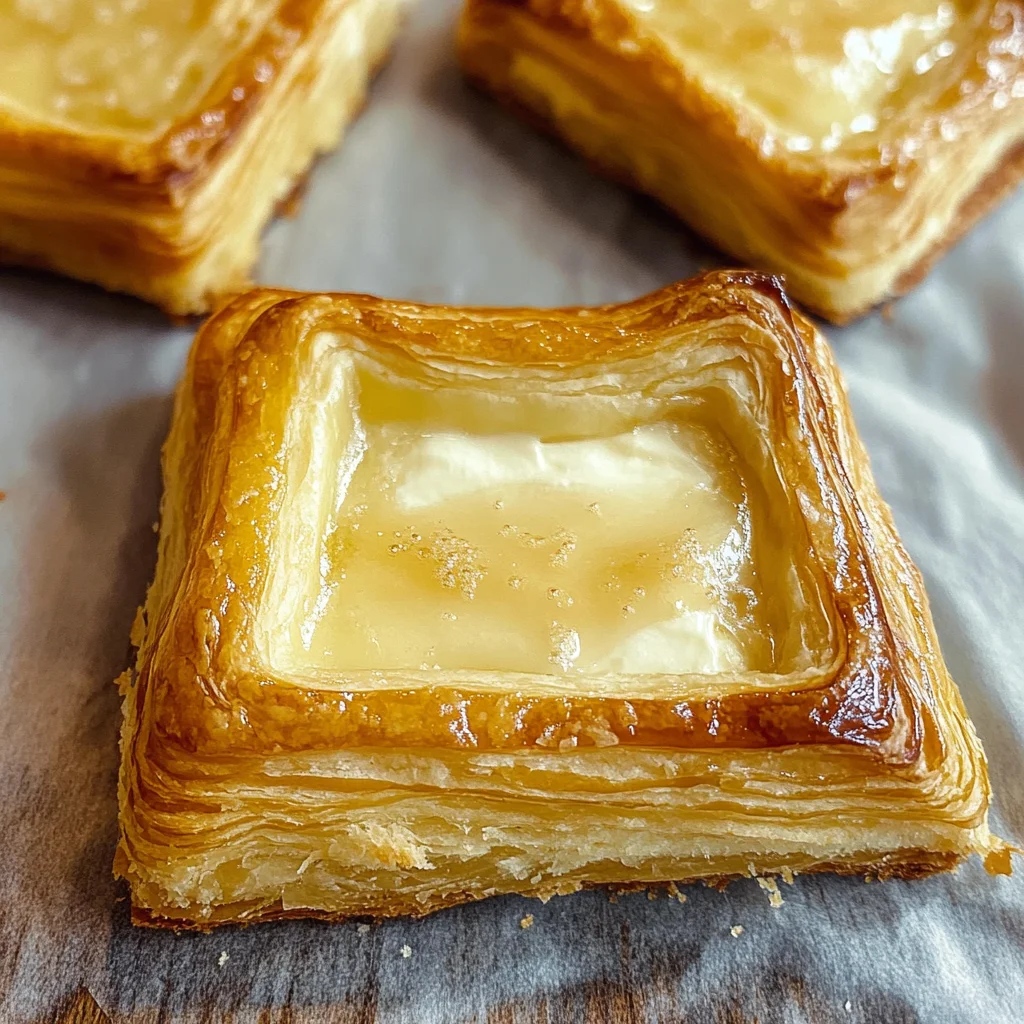
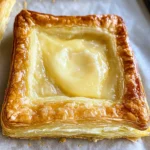
Cheese Danish with Puff Pastry
If you’re looking for a delightful treat that’s as easy to make as it is delicious, you’re in the right place! This Cheese Danish with Puff Pastry has become one of my go-to recipes. With just a handful of simple ingredients, you can whip up these flaky pastries that are perfect for busy weeknights or special gatherings. Whether it’s a cozy family brunch or an afternoon snack with friends, this recipe will surely impress.
What makes this Cheese Danish so special is not just its irresistible flavor but also its versatility. You’ll find that it fits seamlessly into any occasion, making it a beloved addition to your baking repertoire.
Why You’ll Love This Recipe
- Quick and Easy: With only four main ingredients, you can have these pastries ready in no time!
- Family-Friendly: Everyone loves a warm cheese danish, making this a hit with both kids and adults alike.
- Make-Ahead Option: Prepare the filling ahead of time for even quicker baking when guests arrive.
- Delicious Flavor: The rich cream cheese filling paired with buttery puff pastry is simply irresistible!
Ingredients You’ll Need
Let’s gather some simple and wholesome ingredients to create our Cheese Danish with Puff Pastry. You’ll be amazed at how few items you need to make such a delightful treat!
- 4 ounces cream cheese, room temperature (soft)
- 2 tablespoons granulated sugar
- 1 large egg yolk
- 1 teaspoon lemon juice, optional
- ½ teaspoon vanilla extract, optional
- 1 sheet (about 8 ounces) puff pastry, thawed but cool
- 1 large egg, whisked
Variations
The beauty of this recipe lies in its flexibility! You can easily customize your Cheese Danish to suit your taste preferences or whatever ingredients you have on hand. Here are some fun ideas:
- Add Fruit: Top the cream cheese filling with fresh berries or sliced peaches for a fruity twist.
- Try Different Flavors: Experiment with flavored cream cheese varieties like strawberry or blueberry for unique tastes.
- Sprinkle Some Nuts: Add chopped nuts to the filling for extra crunch and flavor.
- Drizzle Some Honey: A light drizzle of honey over the finished pastries can bring an extra touch of sweetness!
How to Make Cheese Danish with Puff Pastry
Step 1: Preheat Your Oven
Preheat your oven to 400°F. This step is crucial because it ensures that your pastries bake evenly and achieve that perfect golden color.
Step 2: Prepare the Cream Cheese Filling
In a medium bowl, mix the soft cream cheese and sugar until smooth. It’s important to scrape down the sides and bottom of the bowl so every bit is creamy and sweet. Add in the egg yolk, and if you like, lemon juice and vanilla extract for extra flavor. Mix until everything is well combined. This filling is what makes your Cheese Danish so delightful!
Step 3: Shape the Puff Pastry
Unfold your thawed puff pastry sheet on a clean surface. Cut it into six equal pieces and place them on a parchment-lined baking sheet. This step creates little pockets for your delicious filling while keeping everything neat and tidy.
Step 4: Fill and Brush
Spoon your cream cheese mixture onto the center of each puff pastry piece. Be generous! Then, brush the edges of each pastry with the whisked egg—this helps them turn golden brown while baking, giving you that beautiful finish we all love.
Step 5: Bake Until Perfect
Bake your Cheese Danish in the preheated oven for about 18 minutes or until they are golden brown and the filling is set. The aroma will fill your kitchen, tempting everyone around!
Step 6: Enjoy!
Once baked, let them cool slightly before serving (if you can wait!). Leftovers can be stored wrapped in the refrigerator for up to three days; just warm them up in a toaster oven or air fryer to enjoy again.
Now you’re ready to impress friends and family with these scrumptious Cheese Danish with Puff Pastry! Happy baking!
Pro Tips for Making Cheese Danish with Puff Pastry
Creating the perfect Cheese Danish is easier than you might think! Here are some tips to ensure your pastry turns out beautifully every time.
- Use room temperature cream cheese: Starting with soft, room temperature cream cheese makes it easier to blend smoothly with sugar, resulting in a luscious filling that won’t be lumpy.
- Don’t skip the egg wash: Brushing the edges of your puff pastry with whisked egg not only adds a lovely golden color but also helps seal in the filling, preventing any leaks during baking.
- Keep puff pastry cool: If the puff pastry gets too warm while you’re working with it, it can lose its flaky texture. Make sure to work quickly and keep it cool until you’re ready to bake.
- Experiment with flavors: While lemon juice and vanilla extract are optional, they add a delightful depth to the filling. Feel free to explore other flavorings like almond extract or even a touch of cinnamon!
- Watch the baking time: Every oven is different! Keep an eye on your Cheese Danish as they bake, and remove them once they’re golden brown and puffed up for the best results.
How to Serve Cheese Danish with Puff Pastry
These delightful pastries not only taste amazing but also look stunning on a serving platter. They make for an excellent breakfast treat or an afternoon snack alongside your favorite beverage!
Garnishes
- Powdered sugar: A light dusting of powdered sugar adds a touch of sweetness and elegance.
- Fresh berries: Placing a few fresh raspberries or blueberries on top adds a pop of color and freshness that complements the rich cheese filling.
- Mint leaves: A sprig of mint can introduce a refreshing contrast and enhance presentation.
Side Dishes
- Fresh fruit salad: A colorful mix of seasonal fruits can provide a refreshing balance to the richness of the Cheese Danish.
- Yogurt parfait: Layering yogurt with granola and fruits creates a satisfying contrast that works well with sweet pastries.
- Herbal tea: A warm cup of chamomile or mint tea offers a soothing accompaniment that enhances your snack experience.
- Coffee or espresso: The bold flavors of coffee pair beautifully with sweet pastries, making it a classic choice for breakfast or brunch.
Now you’re all set to enjoy these scrumptious Cheese Danish with Puff Pastry! Whether you’re serving them at a gathering or simply indulging yourself at home, they are sure to bring smiles all around. Happy baking!
Make Ahead and Storage
This Cheese Danish with Puff Pastry is perfect for meal prep! You can easily make a batch ahead of time, making it a delightful treat ready whenever you need something sweet or a quick breakfast option.
Storing Leftovers
- Wrap each Danish individually in plastic wrap or aluminum foil.
- Place wrapped Danishes in an airtight container.
- Store in the refrigerator for up to three days.
Freezing
- Allow the baked Danishes to cool completely.
- Wrap each Danish tightly in plastic wrap, then place them in a freezer-safe bag.
- Label the bag with the date and store in the freezer for up to two months.
Reheating
- For best results, reheat in a toaster oven or air fryer at 350°F (175°C) for about 5-8 minutes until warm.
- Alternatively, you can microwave each Danish for about 15-20 seconds, but this may soften the pastry slightly.
FAQs
Here are some common questions that might help you while making your Cheese Danish with Puff Pastry.
Can I use different fillings for the Cheese Danish with Puff Pastry?
Absolutely! Feel free to get creative. You can use fruit preserves, chocolate chips, or even savory fillings like spinach and cheese to make it your own.
How long does it take to prepare the Cheese Danish with Puff Pastry?
The total time for preparing these delightful pastries is just 28 minutes, including both prep and bake time!
Can I make Cheese Danish with Puff Pastry without egg?
Yes! You can substitute the egg yolk in the cream cheese mixture with a tablespoon of unsweetened applesauce for moisture without using eggs.
What type of cream cheese is best for Cheese Danish with Puff Pastry?
Regular cream cheese works best as it provides a smooth texture when mixed. Avoid using low-fat options as they may not yield the same richness.
Final Thoughts
This Cheese Danish with Puff Pastry is not only simple but also brings a touch of elegance to your breakfast or dessert table. I hope you enjoy making this delightful recipe as much as I do! Don’t hesitate to share your creations and experiences; I’d love to hear how they turned out. Happy baking!
Cheese Danish with Puff Pastry
Indulge in the delightful simplicity of this Cheese Danish with Puff Pastry, a treat that perfectly balances flaky pastry with a creamy cheese filling. This recipe is ideal for busy mornings or special occasions, allowing you to impress friends and family with minimal effort. Made with just a few easy-to-find ingredients, these delicious pastries can be customized to suit your taste. Whether you enjoy them for breakfast, brunch, or dessert, this Cheese Danish is sure to become a staple in your baking repertoire.
- Prep Time: 10 minutes
- Cook Time: 18 minutes
- Total Time: 28 minutes
- Yield: Makes 6 servings 1x
- Category: Dessert
- Method: Baking
- Cuisine: American
Ingredients
- 4 ounces cream cheese, softened
- 2 tablespoons granulated sugar
- 1 large egg yolk
- 1 teaspoon lemon juice (optional)
- ½ teaspoon vanilla extract (optional)
- 1 sheet puff pastry, thawed
- 1 large egg, whisked
Instructions
- Preheat your oven to 400°F.
- In a bowl, mix cream cheese and sugar until smooth. Add egg yolk, lemon juice, and vanilla; blend well.
- Unfold the puff pastry on a clean surface and cut it into six equal pieces. Place on a parchment-lined baking sheet.
- Spoon the cream cheese mixture onto the center of each pastry piece and brush the edges with whisked egg.
- Bake for about 18 minutes until golden brown and set. Cool slightly before serving.
Nutrition
- Serving Size: 1 Danish (68g)
- Calories: 210
- Sugar: 6g
- Sodium: 180mg
- Fat: 13g
- Saturated Fat: 6g
- Unsaturated Fat: 6g
- Trans Fat: 0g
- Carbohydrates: 19g
- Fiber: 0g
- Protein: 4g
- Cholesterol: 60mg